How to Self-Bind a Quilt
 If you’ve ever wished there was an easier way to bind a quilt than laboriously making your own binding strips and sewing them onto the quilt, there is! You can save several steps (and quite a bit of time) by making a self-bound quilt.
A self-bound quilt uses the backing fabric to create a finished edge around the outside of the quilt. The finished quilt looks like you applied binding, but takes much less time to make than a traditionally bound quilt. Read on for complete instructions.
When Self-Binding Makes Sense
Self-binding is a good option for quilts that won’t see a lot of daily use. The reason? A quilt’s outer edges are prone to more wear and tear than almost any other part of the quilt. A self-bound quilt only has one layer of binding fabric to protect the outer edges, while a quilt bound with double-fold binding strips has two layers around the edges. If you know your quilt will get a lot of wear, it’s probably better to finish it with double-fold binding.
For quilts that will hang on a wall or lie quietly on a table, self-binding can be a real time saver. In my opinion, it looks just as good as strip binding, too.
Tools and Supplies
- A completed, squared-up quilt top
- A piece of batting at least 3″ longer and 3″ wider than the quilt top.
- A piece of backing fabric at least 3″ longer and 3″ wider than the quilt top. Choose a fabric that looks good with the quilt top, because the backing fabric will be the edging for the top of the quilt.
- Scissors
- Rotary cutter
- See-through cutting ruler
- (Optional) washable glue stick. This is the brand I use:
Here’s the quilt top and backing fabric I chose for a modern Christmas table topper. The batting was a thin cotton pieced together from a bunch of smaller scraps.
Step by Step Instructions
- Lay the backing fabric on your work surface, right side down, then center the batting on top of the backing and smooth away any wrinkles.
- Center the quilt top on top of the batting with its right side up and smooth away wrinkles. You may want to baste the layers lightly together with basting spray, but for a quilt this small, I usually don’t baste.
- Sew the layers together. While you do this, try not to stitch off the edge of the quilt top. Any stitches that go beyond the edge will have to be picked out when you trim the batting in the next step. (Why not cut the batting to the exact size of the quilt top in the first place? Because quilting can sometimes shrink the batting. I always prefer to start with a little extra so I know I will have enough when I finish machine quilting.)
- Fold the backing fabric out of the way and use scissors to carefully trim away the extra batting all around the quilt so that the batting is even with the edge of the top.If you did stitch beyond the edge of the quilt top, pick out the extra stitches with a seam ripper or a pair of sharp scissors before you trim the batting.
- Use a rotary cutter and ruler to trim the backing fabric so there is a 1″ edge of backing fabric all around the quilt.
- Starting with one edge, fold the backing fabric up so its raw edge just butts up against the edge of the quilt top. Press the fold in place. If you have trouble getting it to lie flat, you can use a washable glue stick to dab glue along the edge and press into position.
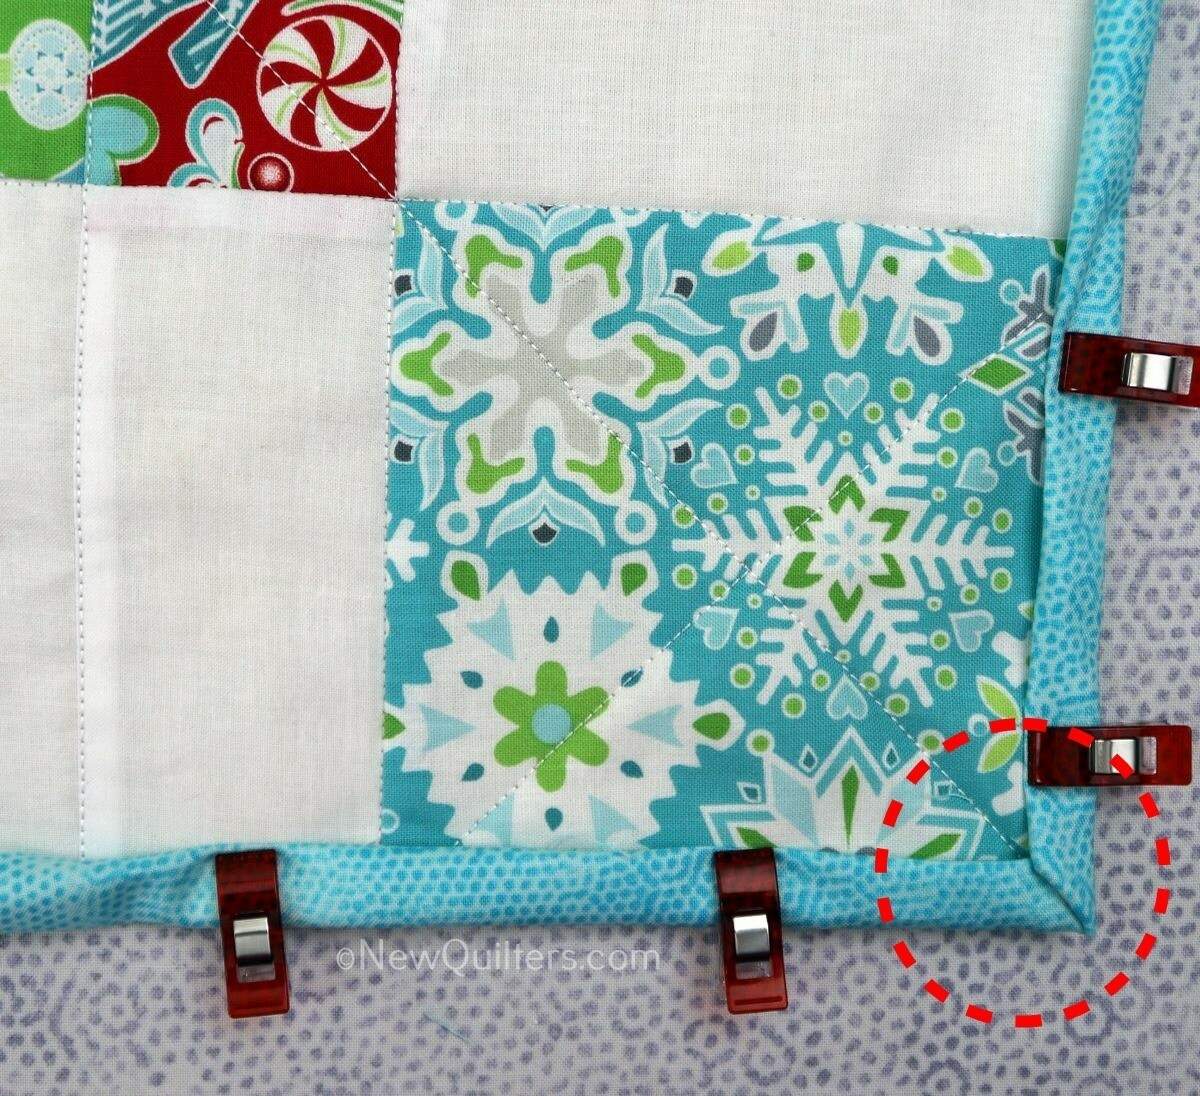
- Fold the edge again so the binding covers the raw edge of the quilt top. Press, then pin or clip in place. I used small Wonder Clips for this step.
- When you reach a corner, fold the binding into a triangle, then press. A dab of glue can really help the folded triangle stay in place.
- Keep the triangle in position as you fold the next side the same way you did on the first side. This will create a miter, or 45-degree angle fold, at the corner.
- Keep folding the binding, making triangles, and folding again to make miters at the corners all around the quilt. Pin or clip the binding into place.
- Top-stitch the folded binding to the quilt top. Stitch as close to the folded edge as possible to make it really secure. You can use a straight stitch or a decorative stitch, as I did on this table runner:
Your self-bound quilt is done! Relax and enjoy your handiwork.
Perfect for mug rugs !!
Thank you for the great, clear instructions and photos! Self binding a lap quilt from old jeans for my nieces & nephew.
Excellent instructions, especially with the pictures. Going to try it on a Christmas table runner that I’m making.
a great idea, looks sharp, and ive never even seen it mentioned anywhere else
I love using this method for my wall quilts as well as the ones that aren’t going to be washed very often.
looks really neat, will try this on my next small quilt