Avoiding an Aching Back while You Quilt
 Before and after the holidays, I logged some long days at the sewing machine, making presents. I made lots of different things —quilts and double-sided napkins, fabric bags and pajama pants.
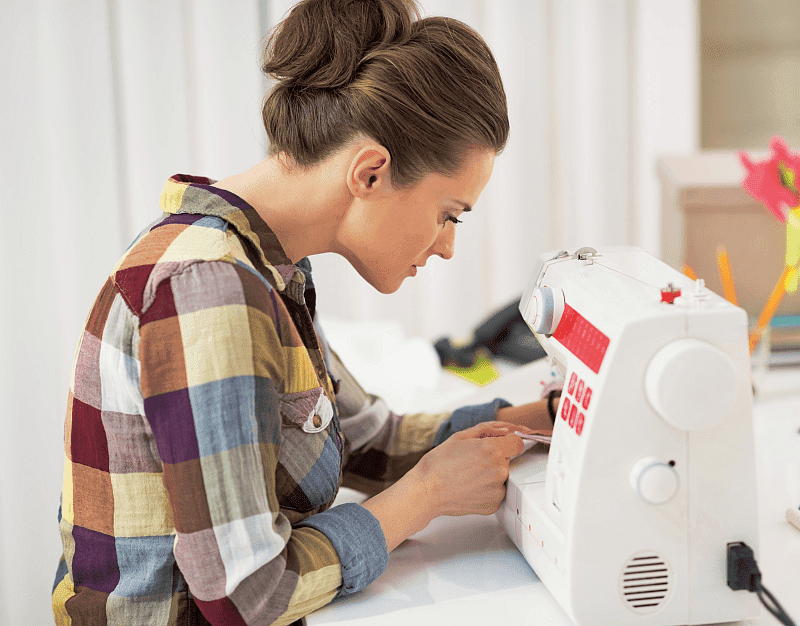
One of the unfortunate side effects of all that sewing was a sore back and shoulders. I’ve also been reading depressing news about how bad it is for us to spend hour after hour sitting, and how much healthier it is to stand up while working. This is great news for those of you with quilting frames, but not so great for those of us who do all our piecing and quilting at sit-down machines.
I went to the chiropractor, who said I should get up every half hour to do some stretches and walk around. Of course this sounds like a good idea, but oh, how hard to do it, especially when I’m in the middle of free motion quilting. What, stop, now? My stipples were just starting to look curvy instead of jerky. But oh, my aching back!
What’s a girl to do when all she really wants to do is keep on sewing? Here are some suggestions I’m planning to implement this year.
Check Your Sewing Position
According to the United States Occupational Safety and Health Administration, a lot of us are causing ourselves aches and pains by sitting in the wrong position to sew. Here’s OSHA’s picture of the ideal position for sewing:
Your forearms should rest level on the sewing machine bed. Your upper arms, lower legs, and back should all be more or less at right angles to the floor. Your chair should allow you to sit close enough to the action so that your back can be straight and upright while you guide the fabric under the needle. You should also be able to clearly see the needle area without scrunching over. Things you shouldn’t do:
- Lean forward or hunch over to sew. (I was guilty of both.)
- Sew with your hands at a higher level than your elbows (guilty again!)
- Let your feet dangle or stretch out one foot at an angle to use your foot petal. (Guilty!)
I realized that my sewing position was off, way off. And the #1 reason for my postural problems was my sewing chair.
Get an Ergonomic Sewing Chair
For several years, my sewing chair has been a dining chair I got at a thrift store. I liked the way it looked, and it had a comfortable padded seat. But in every other way, it was wrong, wrong, wrong. According to OSHA, an ergonomic sewing chair should have the following features:
- Easy-to-adjust height.
- Seat and back rest that tilt and adjust easily.
- Padded back rest with rounded edges to support the lower back.
- Either no wheels, or wheels that lock, to provide stability while working. It’s also desirable to have five built-in feet supporting the chair, for added stability.
- Gently sloped or “waterfall” front edge to help prevent the chair’s edge from pressing into the backs of your legs.
- Cushioned and contoured seat to distribute your weight evenly and avoid creating pressure points.
Here’s an example of an ergonomic chair from the OSHA website:
You can buy special-purpose sewing chairs at sewing machine dealers. I decided to try a secretarial chair my mother-in-law didn’t need any more when she moved to a retirement home. It was free, and it serves the purpose much better than my dining chair. I raised the seat height and adjusted the back to bring me to the right-angle position OSHA recommends. Here’s my current chair:
Take Regular Breaks: Set an Alarm
Encourage yourself to get up and move around by keeping a kitchen timer in your sewing room or setting an alarm on your phone to let you know when you’ve been sewing for 30 minutes. When the timer goes off, stop sewing and get up from the machine. Go to the kitchen. I use this break to warm up my coffee or get a drink of water. In the afternoons, I will take the dog for a walk or spend a couple of minutes standing in front of the refrigerator, wondering what on earth I’m going to cook for dinner.
When you come back to start sewing again, set the timer for another 30 minutes. It always comes as a surprise how fast half an hour goes by when you’re sewing.
Switch up from Sitting to Standing
While it is definitely convenient to have a small pressing station right at your sewing machine so you can press blocks after each seam without getting up, it is better for your health if you locate your pressing station across the room, so that you have to get up and walk over to press your project between seams. It’s also a good idea to switch periodically from sewing to cutting or any other activity you do standing up. If you’re like me, you have no shortage of unfinished projects to switch to when it’s time to take a break from sitting at the sewing machine.
Do I practice what I preach? Mostly. Sometimes I just get too caught up in what I’m doing to stop when I ought to. But one of my goals for this year is to be healthier in the sewing room. I’m working at it! How about you?
In addition to these great tips I have positioned a second sewing machine on top of a “locker shelf” on a counter height table allowing me to sew standing up. I was developing pinched nerves in my upper back and shoulders, resulting in numb fingers. The standing position has helped reduce this problem combined with exercise and frequent breaks. Happy sewing!
I have often thought about setting up my sewing machine to stand while sewing, but haven’t found a table that seemed sturdy enough. I love the idea of having two different sewing stations at different heights. Thanks, Beth!
Thank you for your info on keeping your back healthy while sewing. I am in process of finnishing putting together my sewing room. Just ordered a chair from Amazon!
Happy sewing to all. “Share Your Gifts”
Wishing you many happy and pain-free hours of fun in the sewing room, Cindy.
I use a rubber door wedge, ( or a couple of magazines) at the back of my machine, so that it tilts towards me, no more sore shoulders.
Thanks for the idea, Heather. I’m going to have to try that. I still get a stiff back even with the proper kind of chair.
I put a throw pillow in a pillow case, slip the pillow case over the back of the chair so the pillow pushes against your back. It helps me a lot, I’m a slumped as well. Hope this helps.
Thanks, Sue. That sounds like another idea worth trying.
I’m guilty of using a dining chair too! And for stretching my leg out! One thing I do right (apparently), is get up to go iron. It’s not across the room, but about 4 feet away . . .
Every little bit of movement helps, right, Nichole? I have solved the foot pedal problem by getting rid of my pedal altogether and switching to the start/stop button on the front of my new sewing machine. My old one didn’t have this feature. Now I’m shopping for a foot rest so my feet will be in the proper solid position. And did I mention that I got a whole new sewing cabinet because my new machine was too long for the old one? All in the name of good posture and a happy back!