Charm Squares Place Mat: a Fun First Project for Children
 There’s nothing young children love more than spending time with grownups, helping them do grown-up things. Teaching your child to make a simple quilt is a fun way to spend time together and teach your child the pride of creating something that is both beautiful and useful.
Is Your Child Ready to Start Quilting?
A child who can concentrate on a project for half an hour at a time and follow a few basic safety rules can learn to use a sewing machine and make a quilt (with adult supervision, of course.) Some children are ready at age four or five, and others aren’t ready until later. You know your child best.
Some quilting tools can be risky for children to use: a sewing machine with its sharp, fast-moving needle; a rotary cutter; scissors; pins; and a hot iron. If there’s any doubt about your child’s ability to use a tool safely, be conservative and do that part of the project yourself, with the child watching until he or she can handle the tool safely.
What Kind of Sewing Machine?
A simple mechanical machine without too many settings and accessories is ideal for a child to learn on. If your child shows a real interest in sewing, you might consider getting an inexpensive, child-sized sewing machine. Janome, Singer, and Brother all make small sewing machines for kids. Some of them even special guards around the needle area to protect little fingers.
Set Up the Sewing Area For Success
- Set up the sewing machine on a low table, with a chair that lets your child sit comfortably with feet flat on the floor. He or she should be able to reach the foot pedal without stretching.
- Take your child on a tour of the machine. Point out the on/off switch, the spool of thread and thread path, foot pedal, needle, bobbin, presser foot. If it feels appropriate, teach your child how to thread the needle.
- Show the proper hand position for sewing safely. Show your child how to guide the fabric under the needle instead of pushing or pulling it.
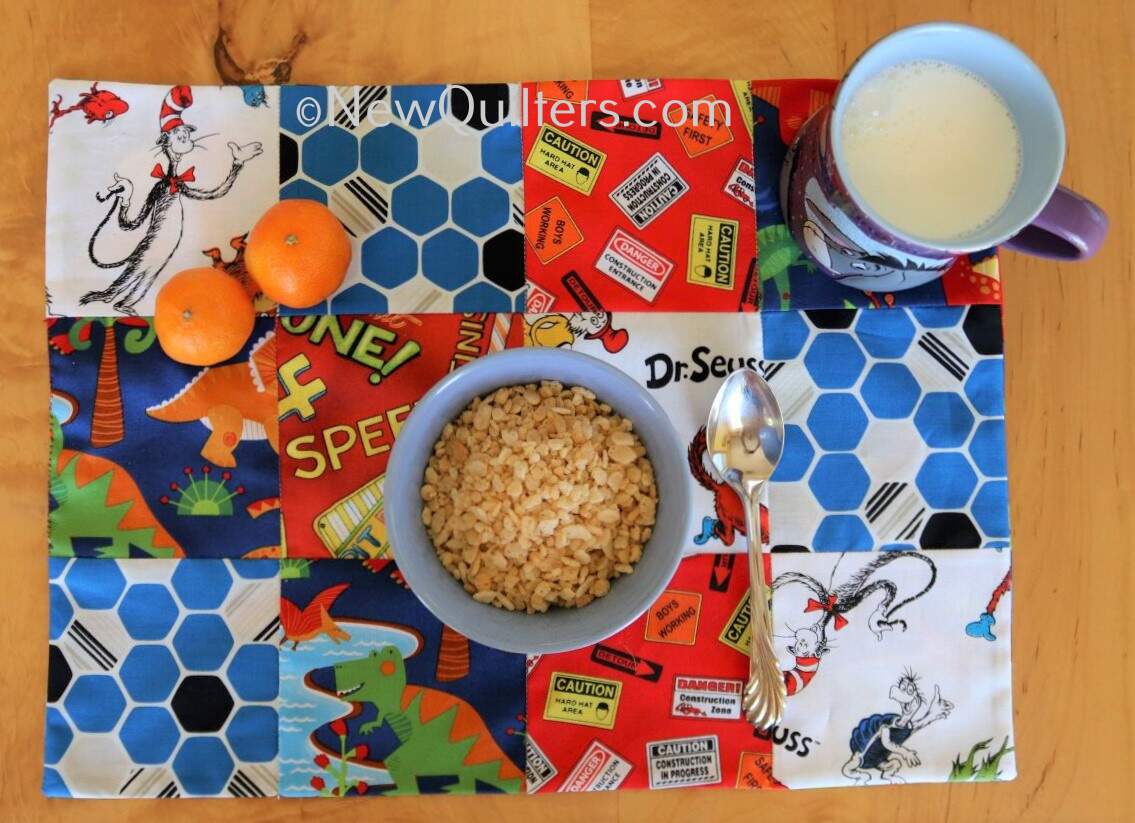
First Project: Charming Kids’ Place Mat
This easy place mat makes a great first project for children. They get the fun of choosing their favorite fabrics and colors to make something they can use every day. The same basic skills a child learns by sewing this place mat can be used to make any quilt.
Tools and Supplies
- Sewing machine
- Blue painter’s tape or masking tape
- All-purpose or quilting thread
- Rotary cutter
See-through cutting ruler - Steam iron
- Twelve 5” fabric squares for the place mat top.
- One fat quarter (18” x 22”) of quilt fabric for the backing.
Let the child choose the fabrics to give her a sense of ownership of the finished place mat.
Step by Step Instructions
- (Optional) Use blue painter’s tape or masking tape to mark a 1/4” seam allowance on the sewing machine bed. This will help your child sew straight lines.
- Have the child lay out the fabric squares in three rows of four squares each. I like to mark the top left square with a safety pin to help keep the squares in order.
- To sew two squares together, lay them with right sides together and corners aligned, then sew them together along the right side.
- Sew the squares together into rows, working one row at a time.
- Once all three rows are complete, sew the rows together, working from top to bottom.
- Use the place mat top as a template to cut a piece of backing fabric the same size as the top.
- Lay the top and backing with right sides together and sides and corners aligned.
- Sew the top and backing together all around the outer edges, leaving a gap about 1 square wide at one end of the place mat.
- Turn the place mat right side out through the gap. If you have a chopstick, use it to poke out the corners.
- Use a steam iron to press the place mat flat. Pay special attention to pressing the seam allowance down in the gap section.
- (Optional) Stitch along the seam lines to anchor the two layers together.
- Use a hand needle and thread to whip stitch the gap closed.