How to Make Gift Card Envelopes — Tutorial
 Giving someone a gift card doesn’t have to have that impersonal, last-minute feeling. Make your gift something unique and personal by sewing a cute little fabric envelope to hold a gift card (or a crisp twenty-dollar bill).It’s easy to customize your gift by choosing fabrics that fit the person and the occasion. It takes less than thirty minutes to make a gift card envelope that can be reused over and over. This quick little DIY project is also a great way to use up fabric and batting scraps.
Supply List
- 5” x 8” rectangle of decorative fabric for the outside of the envelope. Note: Some gift cards are larger than the standard credit-card size. If that’s the case, just make the rectangles of fabric and batting large enough that the card fits inside when you fold the rectangle into an envelope. (Make sure to add an extra 1/2″ of width to your fabric to account for seam allowances.)
- 5” x 8” rectangle of coordinating fabric for the envelope lining
- 5” x 8” piece of thin batting (cotton or bamboo both work well)
- All-purpose thread in a coordinating color
- Velcro dots or decorative button for pouch closure
- Sewing machine
- Rotary cutter
- Cutting ruler
- (Optional) wash-away glue stick for basting.
Step-by-Step Instructions
- Cut one 5” x 8” rectangle each of the main fabric, the lining fabric, and the batting.
- Layer the fabrics with the main fabric facing right side up on the bottom, the lining fabric right side down in the middle, and the batting on top.
- Make a curved edge by folding the sandwich in half lengthwise. Cut a curved line from the fold to the edge. Make sure your curve’s highest point is at the fold, not the outer edges.I just cut freehand, but if you are concerned about perfection, use a marking pen or pencil to draw a cutting line and cut when you are satisfied with the shape of the line. The fabric layers in the photo above have already been cut into a curve on top.
- (Optional) Add quilting or decorative stitching.
- Sew around the edge of the rectangles with a ¼” seam allowance, leaving an gap of a couple of inches on one of the tall sides so you can turn the envelope right side out.
- Turn the envelope right side out through the opening. I use a takeout chopstick to poke out the corners. If you’re concerned about achieving really sharp corners, you can also trim off a little triangle of seam allowance at the bottom cormers.
- Press the envelope. Pay special attention to turning under and pressing the seam allowance in the unsewn area. I used a dab of wash-away glue stick to hold the open edges together.
- Fold up the bottom edge of the pouch, then press to mark the fold line for stitching later. I use an old credit card to make sure the fold is in the right place.
- Use your ruler to find a point halfway across the width of the envelope, then place a Velcro dot on the underside of the flap. I use the ones with glue so I can temporarily fix the dot in place for sewing. Put a matching Velcro dot on the body of the envelope.
- Stitch the Velcro dots in place. I like to use my sewing machine’s button stitch. You can sew them on by hand, too, but it’s harder to get the needle through the Velcro and glue than to sew the dots on by machine.
- Sew up the sides of the envelope with a 1/8″ seam allowance, making sure your stitches catch the unsewn section where you turned the pouch right side out. I used a contrasting thread in my sample envelope so you can see where I stitched, but you can use a thread that fades into the background.
- Hand stitch a bell, a button, or another embellishment to the envelope’s flap. This disguises the stitches that hold the Velcro dot to the flap.
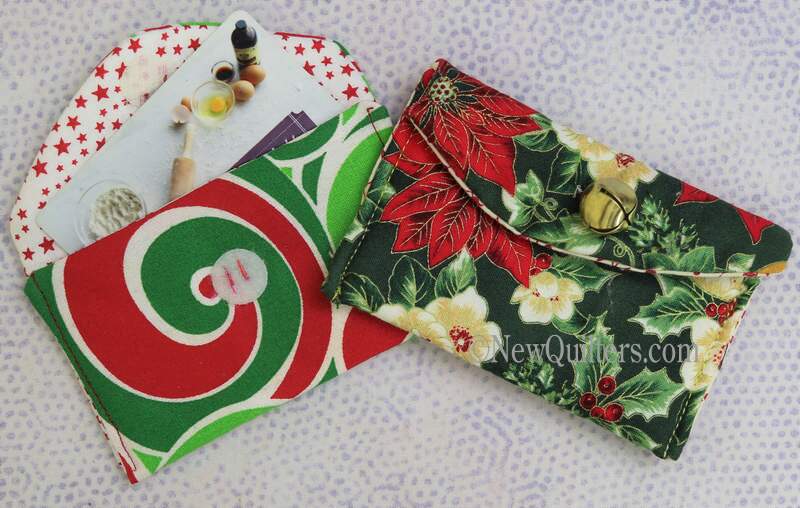
That’s it! You now have a festive way to wrap gift cards for Christmas or other special occasions.
You can use the same steps to make gift envelopes in larger sizes. In the olden days I used to make them for CDs and DVDs.