How to Sew a Maple Leaf Quilt Block — Tutorial

Finished Block Size: 13-1/2″ x 13-1/2″
What says “autumn” more beautifully than a maple leaf quilt block? This tutorial shows you how to make the block with a super-quick and easy raw-edged layering method I love, because it requires no marking and almost no trimming.
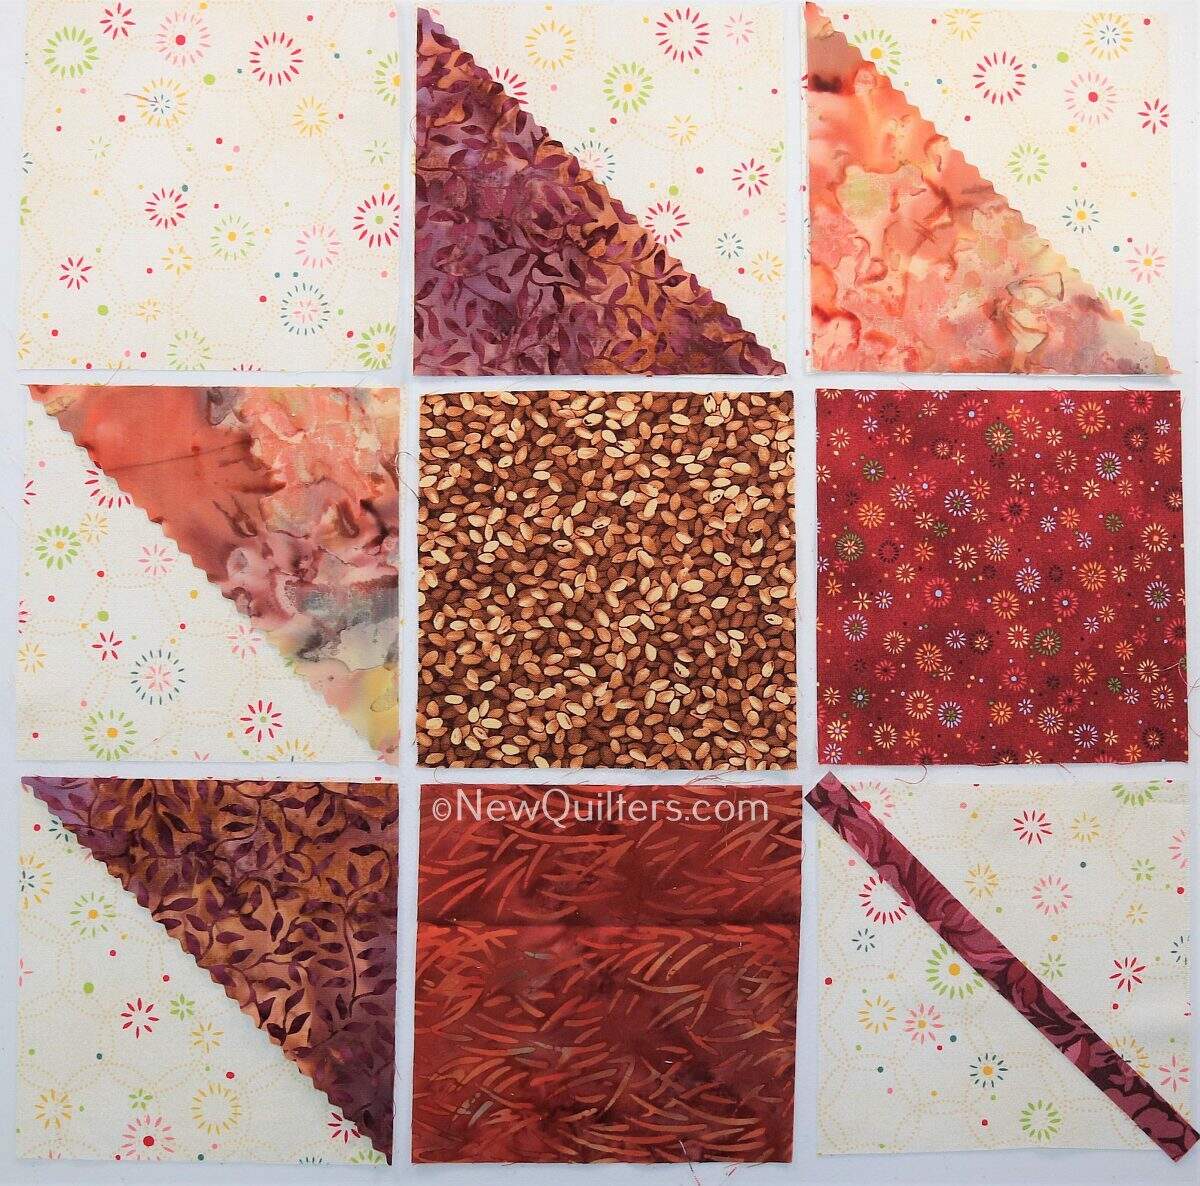
A maple leaf block is a type of nine-patch block — that is, a block with nine squares arranged in three rows of three. The photo above shows you the nine squares.
Tools and supplies
- (Optional) Pinking blade on your rotary cutter, although you can certainly make the block using a regular blade. A pinking blade cuts a zigzag edge that minimizes fraying on the raw edges of the block’s top layers. (I also think a pinked edge looks really cute.)
- Quilting thread in a color that blends in with your leaf fabrics. You will use this to topstitch the leaf points and stem onto the background fabric. I used Isacord thread in a variegated brown.
Fabric You Will Need
This block is made entirely from 5″ charm squares except for the stem, which you can make with a piece of scrap fabric. I used a leftover bit of binding fabric from another quilt. To make the leaf shape stand out, make sure there is a strong contrast between the leaf and background fabrics.
This layering technique works best if your leaf fabric is darker and the background is lighter. (If you make the leaf lighter than the background, the background fabric may show through the leaf in a way that doesn’t look so great.)
Here’s what you will need:
- Five 5″ squares of leaf fabric, plus a scrap for the stem that measures 1/2″ x 7″. You can make all the squares from the same fabric or use several different fabrics, as I did.
- Six 5″ squares of background fabric I used the same fabric for all my background squares, but you could make the background scrappy too.
Step by Step Instructions
- Use your rotary cutter (ideally with a pinking blade) to cut two of the leaf fabric squares diagonally in half. These will be the points of the maple leaf.
- Arrange the leaf and background squares as shown in the photo below. Put the stem and each triangle on top of a background square.
- Topstitch the triangles onto their background squares. The photos below shows where to sew. Place your stitching line close to the diagonal edge of the triangle. I pinned the triangle points to the background fabric to keep them in place while I sewed.
- Topstitch the stem onto its background square. I stitched two seams, one on each edge of the stem.
- Sew the squares into rows, using a 1/4″ seam. I usually start with the top row and work my way down.
- Press the seams in the rows in alternate directions. This will help you align the seams in the next step.
- Sew the rows together, nesting the seam allowances at the places where seam lines join. I like to pin the seam allowances in place.
- Press the block, square it up, and you’re done!
By the way, maple leaf blocks don’t have to use autumn colors. I made this one from pale pastel batiks to inspire you to try different color combinations.