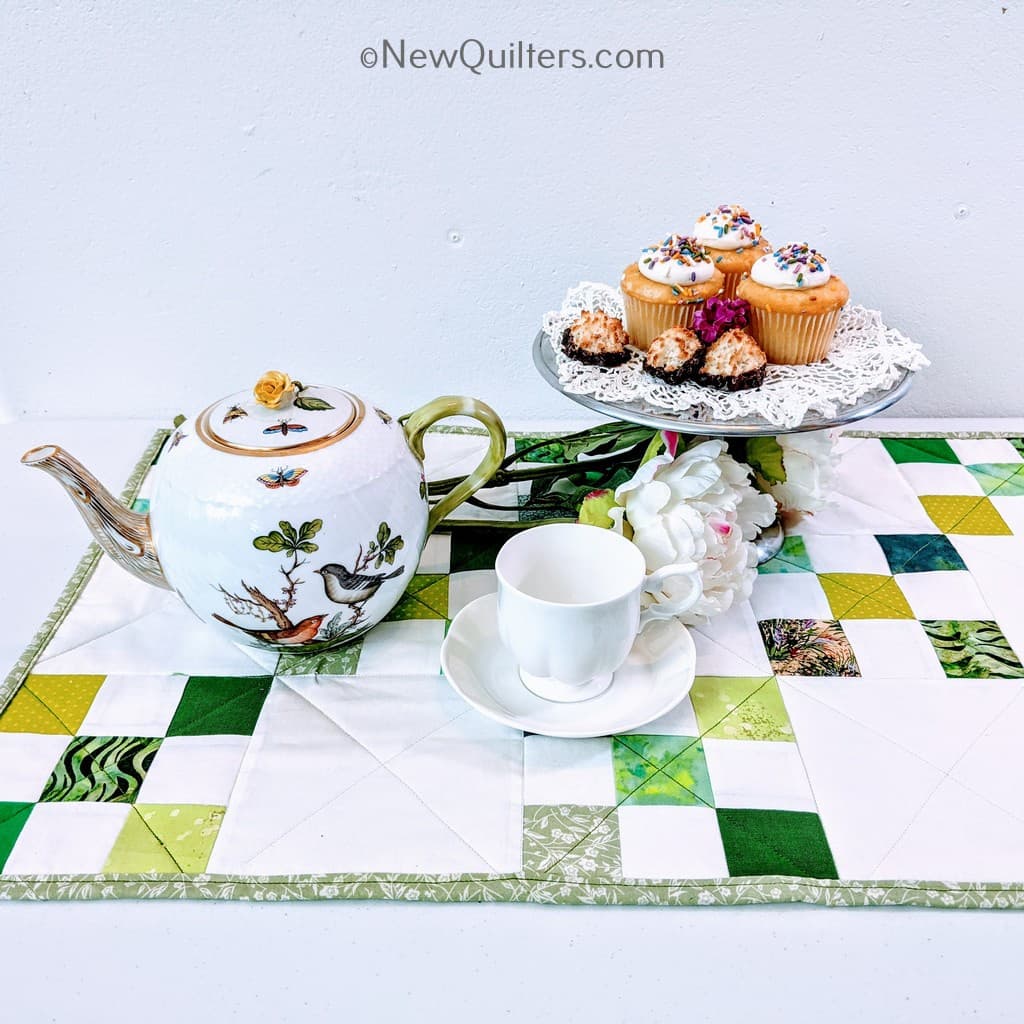
Scrappy Green Irish Chain Table Runner Quilt

Quilt size: 18″ x 44″ (46 x 112 cm)
Skill level: Beginner
If you have green fabrics in your stash, this scrappy table runner is a fun way to use them for St. Patrick’s day, or any occasion when you want your table decor to be green. The table runner combines scrappy nine-patch blocks and white squares.
The original inspiration for this quilt and the technique used to make it came from the AbyQuilts blog.
My version differs from the original in a couple of ways: (1) I enlarged the quilt by starting with wider 2-1/2″ strips; and (2) I changed the shape from a square to a rectangle to fit better on my long kitchen table. If you prefer to make a small square table topper, you’ll find instructions in AbyQuilts’ post.
Fabric You Will Need
- 6-8 green cotton prints or solids that look good together. You will need about 1/8 yard of each. You will probably end up with some leftovers, but having extras gives you more flexibility to choose just the right fabric for each block.
- 3/4 yard of white solid cotton.
- 1/3 yard binding fabric.
- 1-1/4 yard backing fabric.
- One 20″ x 46″ piece of a thin batting/wadding such as cotton or bamboo. Thin batting allows the table runner to lie flat on the table top.
These quantities assume that your fabric is 42 usable inches wide, excluding selvages. Your actual fabric may be wider or narrower, depending on the manufacturer.
Pieces to Cut
- Green prints or solids:
- Cut one or two strips of each green fabric that measure 2-1/2″ x the width of the fabric from selvage to selvage. (You can also cut shorter strips if that’s what you have. This is a great way to use up small quantity fabrics from your stash.)
- Cut eleven 2-1/2″ green squares. Instead of cutting these from strips, I took four 5″ green charm squares from my stash and cut them in half twice, as shown below. This yielded sixteen 2-1/2″ squares. If you do this, you will have a few extra squares but the extras give you more flexibility in choosing just the right fabric for each block.
- White solid:
- Count the number of green 2-1/2″ strips you cut, and cut the same number of 2-1/2″ white strips.
- Cut two strips that measure 6-1/2″ x the full width of the fabric. Cross-cut the strips into eleven 6-1/2″ squares.
- Binding fabric: Cut four strips that measure 2-1/2″ x the full width of the fabric.
- Backing fabric: Cut one piece 20″ x 46″. This allows for a 2″ margin of error all around the outside of the quilt top. You can sew together smaller pieces to make the backing if needed. No one ever looks at the backing of a table topper!
- Backing/wadding: Cut one 20″ x 46″ piece
Before You Start…
The nine-patch blocks that make up this Irish Chain pattern are strip pieced. This means you cut strips of fabric, sew strips together, cut the sewed-together strips into smaller units, rearrange the units, then resew them into complete blocks.
Most strip-pieced nine-patch blocks are made from sets of three strips, but this quilt uses two-strip sets because that lets you get a greater variety of different greens in each block. You’ll see how that works in the following steps.
All the nine-patch blocks have green fabric at the outer corners and in the center square of the block:
Step-by-step Instructions
- Sew each 2-1/2″ green strip to a 2-1/2″ white strip, then press the seam allowances to the darker side.
- Cross-cut the strip sets into units that are 2-1/2″ wide. You will need 44 of these, plus eleven 2-1/2″ squares, to make the 11 nine-patch blocks in the quilt.
- Arrange four cut units and one 2-1/2″ square into each nine-patch block, as shown here:
- Sew the block together, using scant 1/4″ seams. I sewed the three units on the left into one column, the unit and square on the right into a second column, and then sewed the two columns together.
- Square up the blocks.
- Arrange the nine-patch blocks and white squares as shown here, alternating green and white blocks.
- Layer and baste the backing, batting, and quilt top together.
- Quilt the layers. I straight-stitched simple Xes across the centers of all the green blocks and white squares, using a walking foot. If I had more time, I would have quilted more lines to make the Xes denser.
- Bind the quilt and put it on your table for all to enjoy.
Learn my fast and easy binding technique — no hand stitching!