Double Disappearing Nine-Patch Blocks — Tutorial
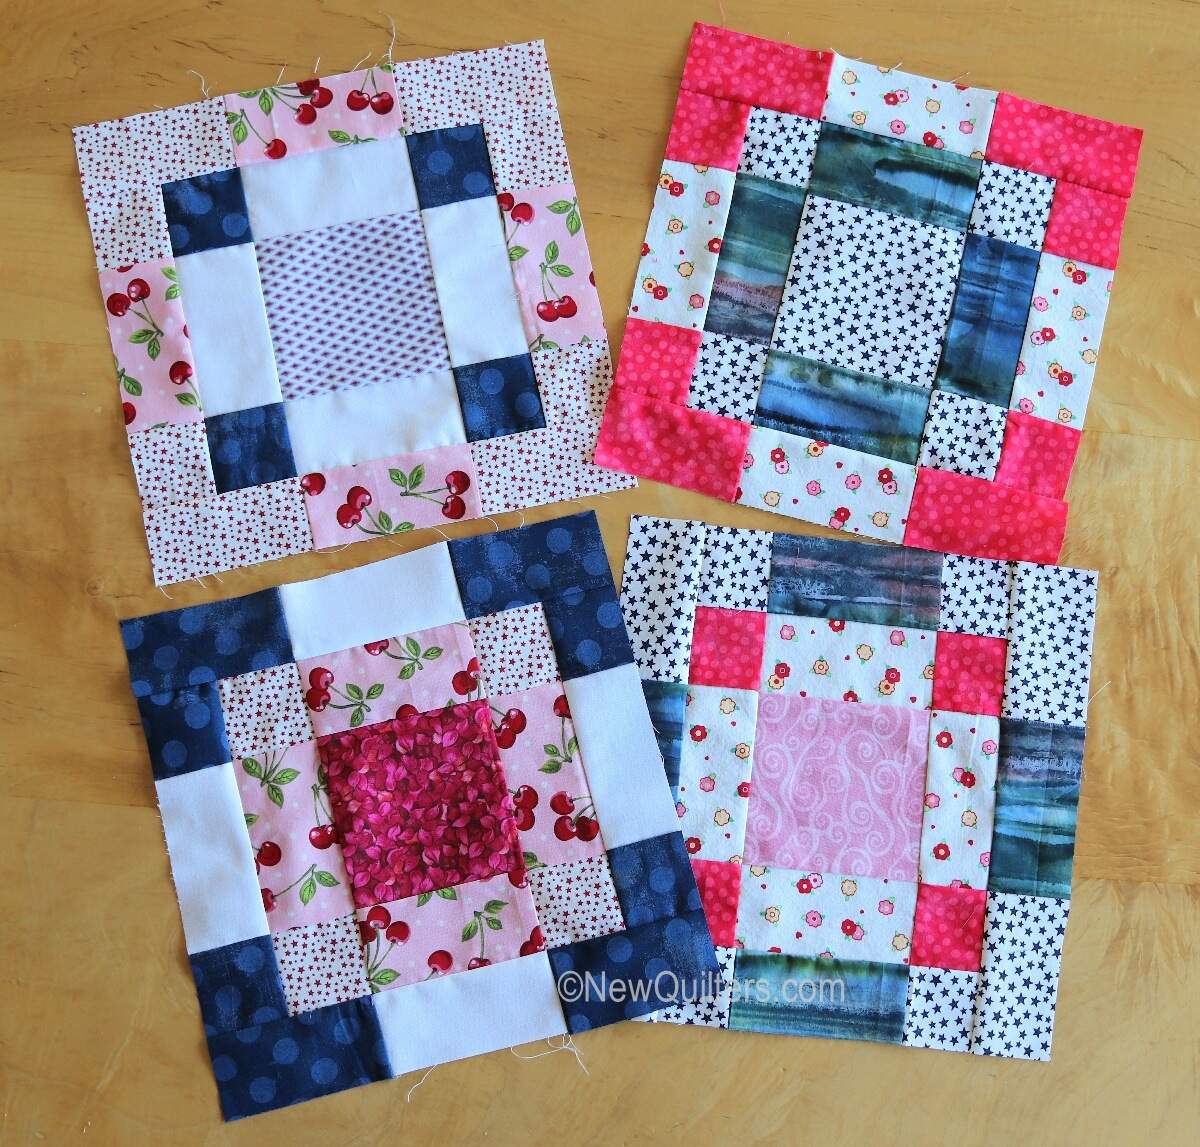
 What does it take to turn a set of 5″ squares into these sophisticated disappearing nine-patch blocks? Some simple sewing, cutting, and resewing.
Fabric You Will Need
- Eighteen assorted 5″ squares for each set of two blocks. You need to make two blocks at a time because you’ll be swapping sections between the two blocks to create the finished blocks.
Step by Step Instructions
- Lay out each set of squares into two nine-patch blocks in colors that coordinate with each other. Arrange one set of nine so it has darker squares at the outer corners (I call this a positive nine-patch), and one set so it has lighter colors at the corners (a negative nine-patch.) Here is one of my positive nine-patch blocks:
And here is the negative nine-patch block I paired with it (lighter fabric at the outer corners.) - Sew each set of squares together into a nine-patch block, using a scant 1/4″ seam.
- Press the blocks.
- Slice the outer rows of each block in half vertically, then cut the center section horizontally across the top and bottom. Measure 2-1/4″ from the center seams to make your cuts. Here’s one of my cut-up blocks.
- Now comes the fun part! — the big swap. Rearrange the blocks, putting all the outer slices of one block around the center of the other block, and vice versa. Here are the rearranged blocks that came from my original nine-patches.
- Sew the cut sections back together. Take special care to align the points where the seams join. I find that pinning the joins before you sew really helps. You may also have to flip some of the seam allowances on the back sides of the blocks so the seams will nest properly.
- The outer vertical sections will be longer than the section you’re sewing them to. Align the seams together and don’t worry about the extra fabric.
- Press the blocks, square them up, and trim off the extra parts. Your blocks are complete!
Here’s another set of blocks I made for a Halloween table runner. I used a bolder set of prints for these:
A set of four blocks I made into a square springtime table topper…
And another set that will become the long, thin Valentine’s Day table runner shown below.
Thank you for the clear tutorial! I’ve used it several times to make different things. Fun to make and great result!
Very nice tutorial with great photos and good instructions! Can’t wait to cut up a layer cake and try it. I have the perfect one that’s been waiting for a pattern to catch my eye. DONE!
Thanks for your kind words, Deb! Christine
I saved this pattern when I first came across it on the old Delphi email list back in the 90’s. It makes a very pretty quilt.
The pattern is one that is great for all the scraps I have. I will try it and let you know how I make out. I found the directions easy to follow. I like the nine patch as it is easy to assemble and use in many different ways. It is also a pattern that you can make up ahead and when the urge comes to make something you can have them already done, just assemble.
Send pics when you complete one!
I don’t see any dates anywhere on this posting so I have no idea how long it’s been up but I will venture a question anyway and hope you can answer it. What is the size of a completed block? I hope you see this question as well as my next question. Do you think trying to make a 6 1/2 inch finished would be too small for this pattern?
Hi Gertrude,
The finished double disappearing blocks I’ve made are about 14″ square. I’m not an accurate enough quilter to make a block with a completed size of 6-1/2″, but there are some people who work with that kind of precision. You’d be working with teeny tiny pieces! I’ll leave it up to you whether you’re a person who likes to work small or not.
Your instructions for the disappearing nine patch was very complicated. I did not understand the cutting at all.
Perhaps a video would be more helpful, especially to beginners.
Love the owl print and bright colors. Could be a fine quilt for a child!
Yes I would like the tutorial for the table topper love how it just pops.
Loved the pictures of the cabin, we stayed in one at Tellico Plains, Tn. last year. And I would be interested in the tutorial of the Square Table Topper.
Wow. The finished blocks look way more complicated than they really are, given your easy instructions and pictures. Thanks.
Thanks, Ruthmary!