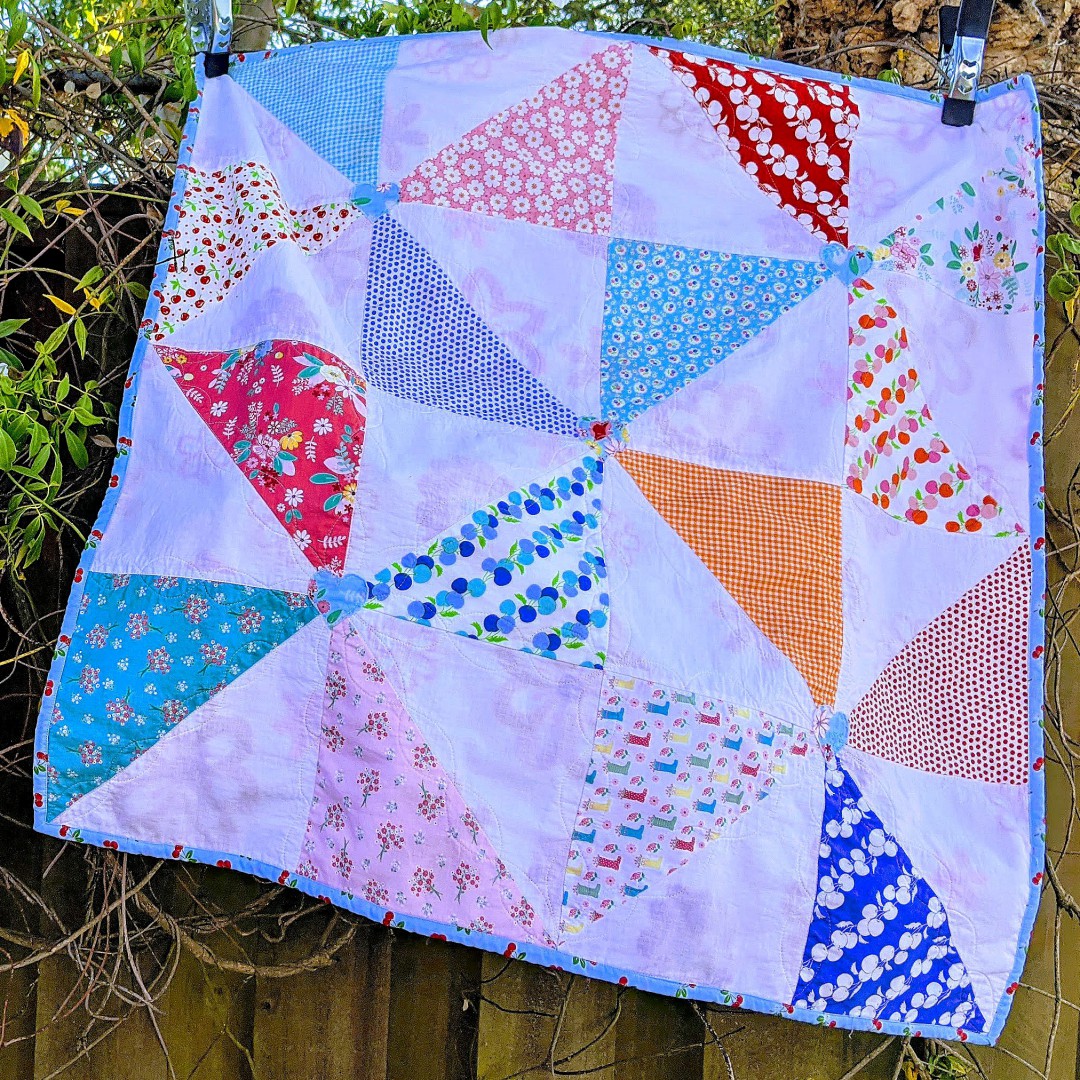
Pinwheel Layer Cake Baby Quilt

There’s something fun and festive about pinwheel blocks that makes them look great in quilts for a person of any age, from babies to adults.
If you know how to make a half-square triangle block, this pinwheel baby quilt couldn’t be easier to sew. Start with 10″ squares from a fabric layer cake collection (or you can cut some of your favorite fabrics into 10″ squares), make sixteen half-square triangle blocks, and use the pattern below as a guide to arrange them into four cute pinwheels.
The finished quilt is the perfect size for a baby gift. You can make it in traditional “boy” or “girl” colors, use a unisex color scheme, or choose seasonal fabrics to celebrate a holiday like Halloween or Christmas.
If you don’t know how to make half-square triangles, they’re easy! Click or tap here to see our tutorial.
Pinwheels Layer Cake Pattern
Size: 36″ x 36″ (91.5 x 91.5 cm)
Fabric You Will Need
- Eight 10″ squares of white cotton quilt fabric, or 5/8 yard if you want to cut your own squares from yardage.
- Eight 10″ squares of colored fabrics that look good together. I combined fabrics from two different layer cake collections: Singing in the Rain by Beverly McCullough (Riley Blake), and Badda Bing, by Me & My Sister (Moda.) I find that using more than one collection gives the quilt a nice variety.
- Binding: 1/3 yard
- Backing fabric: 1-1/8 yard (this allows for an extra 2″ of backing fabric all around the quilt.)
- Batting: One piece 38″ x 38″.
Step by Step Instructions
- Blocks: Combine each white square with a colored square and make each set of two squares into half-square triangle blocks. The eight sets of squares will make sixteen triangle blocks. Learn how to make half-square triangle blocks.
- Use a ruler and rotary cutter to trim the blocks to 9-1/2″.
- Using the pattern above as a guide, lay out the blocks into four rows of four blocks each.
- Sew the rows together, using scant 1/4″ seams.
- Batting and backing: Cut the batting and backing fabric to 38″ x 38″.
- Layer and baste the quilt top, batting, and backing. Learn about basting.
- Quilt the layers together. I recommend stitching in the ditch as the first step in machine-quilting. If you also want to add free-motion quilting, this free-motion double scallop motif creates a pretty floral design on the back of the quilt.
- Binding: Cut four strips that measure 2-1/2″ x the full width of your fabric, from selvage to selvage.
Make the strips into quilt binding, then sew the binding to the quilt. Learn how to bind a quilt with no hand sewing. - (Optional) I added five little ragged-edge applique hearts to the top of the quilt, at the centers of the pinwheels. The fifth heart is right at the center of the quilt.
I used polyester fleece as backing for this quilt instead of the traditional batting/backing fabric combination. In my cool-all-year climate, fleece makes sense. If you live in a warm or hot climate, you may want to omit the batting layer and use a single layer of flannel for the quilt backing. Flannel is just as soft as fleece and much thinner and lighter.
Learn how to back a quilt with fleece.
Something to note about fleece backings is that the colors and patterns from the fleece will show through white areas on the quilt top. I actually like this look, but you need to be conscious of how the fleece will affect the way the quilt looks from the top. If you don’t want anything to show, use batting and backing fabric. The batting will keep anything from showing through on the quilt top.
What size square should I cut for a triangle QUILT? I used 6in square @ it looks so big-after I cut the material into a triangle @ sewed it. I don’t like it. I used a print @ white. Tks
Hi Judy,
The quilt in this post starts with 10″ squares, so the triangles will be even larger than your quilt starting with 6″ squares. If the triangles you cut from 6″ squares look too big, you can go with smaller ones. Coordinated sets of 5″ squares are easy to find, or you can go even smaller, to 4″ or 3″ squares. The smaller the square you start with, the fussier it is to cut and sew the triangles, and the more triangles you will need to make a quilt of any size. I like big squares because they make for easy cutting and sewing, but you don’t have to limit yourself to what I like.